Wednesday, 15 August 2012

Quiche Me Twice, I'm European!


Cultural norms are so unfixed and so relative that I often find myself in inevitably awkward situations, particularly in countries where there are no strict set of social norms (generally in the New World), such as greeting people via kisses on the cheek. I cannot count the times I reached for the second kiss only to be left hanging or alternatively, going in for the other cheek and realizing the receiver has already moved on.  When in Canada or in New Zealand I still have not figured out what is the preferred greeting, one kiss on the cheek or two, or none? I miss the clarity of European customs where one knows exactly what to expect in the respective country. No matter, I shall do it my way and stick to two of everything, like it or not.

Where am I going with this you may ask? I am about to talk about quiche and I don’t want to stick to just one kind. I love it far too much and you know if I make two types of quiches for you, I must be fond of you.

As I said, I love quiche, but for years now I had the worst luck trying to find a decent one, let alone an edible one. They often tend to be soggy and tasteless. Why? What’s so hard about making a proper quiche? After years of hesitantly ordering quiche in various cafés and restaurants (the Quiche Lorraine served for brunch at Le Select in Toronto is an exception) I have given up on the hope of finding something I like, so a few years ago I started making my own. The heavenly aroma wafting through your home is worth the small effort, trust me.

Maronen
My two favorite quiches are Quiche Lorraine and Mushroom Quiche.  Quiche Lorraine is a classic, made with bacon or lardons, while the mushroom quiche is really my own thing. I like to forage, did I tell you? Yea, there is nothing tastier or more rewarding than food that you’ve picked yourself. Oh yea, and I am a bit of a Fungophile as well. I love picking mushrooms, it reminds me of long Autumn walks through the Odenwald, a forest range that extends into the Heidelberg area in Germany where I used to live, with basket and knife in hand trying to spot Steinpilze (Porcini mushrooms) and Maronen (Bay Bolete mushrooms). These are some of the tastiest mushrooms there are. Absolutely divine in a stew!

I had a blast this fall in Auckland trying to find mushrooms but too nervous to pick them as I am unfamiliar with mushrooms in this part of the world. Luckily, I live near the beautiful Cornwall Park and there is a sweet spot in the olive grove where I find (safe-to-eat and easily-identifiable) Wood Ear mushrooms found growing happily on rotting wood. I made many a dish using the Wood Ear which is mostly valued for its texture and health properties - A. auricula-judae has antitumour, hypoglycemic, anticoagulant and cholesterol-lowering properties.  I particularly like using in as part of the mélange of mushrooms in my quiches.

Wood Ear Mushrooms

I have been away from New Zealand for the winter and now that I am back at its tail-end I have been surprised to find that my wood ear mushrooms have had a second wind. Normally they are ripe for the picking in the autumn but on my walk through the park the other day I found them alive and well. How could I resist?


Making the Pastry Base:

·         In a food processor pulse: 200g cold butter (cubed), 400g flour, pinch of salt, until the pastry begins to clump together, kind of like loose moist sand

·         In a cold bowl: pour in the contents of food processor and form a well, then pour in 100ml of water and mix gradually by hand

·         Sprinkle a clean surface with flour and transfer the loose pastry mixture to it for light kneading, ultimately forming a ball.

·         Cut ball in half and re-form both halves into balls

·         Cover them with plastic wraps and place in refrigerator for at least 30 minutes, or store in freezer if not using it immediately. The pastry will make two quiches.


Quiche Loraine

·         In a pan, melt 10g of butter then brown about 100g cubed bacon, pancetta or speck

·         Once the bacon is fried use some of the remaining fat in the pan to oil the inside of your quiche pan using a paper towel

·         Roll out the ball of pastry on a floured surface so that it is about 2.5 inches wider than the diameter of your pan.

·         Place the rolled out pastry into the oiled pan pushing securely against the edge of the pan.

·         Using a fork, prick holes into the bottom of the pastry.

          Distribute the cooked bacon and its oil over the surface of your pastry

          In a bowl whisk: 3 eggs, 200g crème fraiche (alternatively use table cream), salt and pepper to taste, and a sprinkle of nutmeg

         Pour the custard into the pastry-lined form
     Grate on a bit of Edam or Gruyere cheese

·         Place the pan in a preheated oven at 185 C or 360 F for about 50 minutes (you should check that the top of the quiche does not burn).


Mushroom Quiche:

·         In a pan, melt a tablespoon of butter and add some finely leek or chopped shallot, a bunch of sliced melange of mushrooms (ie. Cremini, Oyster, and Wood Ear), and sauté until all are softened and cooked through. Half way through throw in some chopped herbs like rosemary, thyme or sage, or even better, all three.

·         Season well with salt and pepper.

·         In a bowl whisk: 3 eggs, 200g crème fraiche (alternatively use table cream), salt and pepper to taste, and a sprinkle of nutmeg

·         Pour the custard into the pastry-lined form

·         Place the pan in a preheated oven at 185 C or 360 F for about 50 minutes (you should check that the top of the quiche does not burn).
Now, take a moment and relish the heavenly aroma that your home has been anointed in, take the quiche out of the oven, and let cool down a bit before slicing.

Mwah, mwah. Enjoy!


Wednesday, 11 July 2012

It’s flat, it’s white … yea, yea, yea

Have a coffee, this might take a while.


 The beginning of the love affair. Naples, Italy, 2002

I relish my coffee, however I am not a fan of  the filtered kind as I find it watery and far too heavy on the caffeine.  In Toronto, I relied on a few sublime coffee houses to feed my yearning, nay, my right to this dark, rich, hypnotic master. However, for my quotidian consumption I rely on my faithful macchinetta for my espressos, café lattes, cappuccinos and cortados. Coffee is so important to me it seems that even while selecting a travel destination, the availability of good coffee factors in, albeit unconsciously, more than I care to admit.  It is no wonder then that for the past five years in a row I managed to somehow end up in Spain.


 The fruit of my humble macchinetta

But New Zealand, really? Not for a millisecond did I suspect it! I am certain that my earlier and very mistaken conviction of this country’s mediocre cuisine would somehow extend to coffee, kind of like Canada.  After all, culturally we have the same roots. Yes, I blame Britain. I had visions of bad filtered Irish Cream flavoured coffees likened to the “pisswasser” one readily finds in Canada (Tim Horton’s anybody?). I am sure this contributed to my growing anxiety before moving down here. I continue to be proven wrong, oh so wrong.


A few of the many lovely coffees I've enjoyed  around NZ

The last thing I expected would be that NZ would be the hidden epicentre of coffee culture, nearly rivaling those which I considered to be the kings of kings, Italy and Spain. You know you are in the presence of greatness when they have even coined their own coffee, the flat white.


A flat white

 I mean, it’s not like there are just a handful of really good coffee houses sprinkled around the city centre, the kind of destination spots you can only access when you’re in the area if you’re not lucky enough to live in hipster-land, as is the case in Toronto. Oh no, it’s far more democratic than that. Everyone gets access to the good stuff, everywhere! Just drop by a BP station for a fill-up and you’ll get a damn good cappuccino, no problem.

A BP station in Auckland adversising their flat white coffee

What is going on here? Could it be some kind of a small man complex? To go so far as to train gas station attendants to use real espresso machines and then have them actually turn out a decent latte!  I’ll need to dig deeper.


So it appears that in the last couple of decades, New Zealand has undergone a coffee revolution as many Kiwis have become connoisseurs of coffee. The increased popularity of coffee has prompted a growth industry with new cafés and coffee roasting outlets springing up all over the country. Coffee-making is also very competitive, with baristas vying to make the perfect cup of coffee and coffee drinkers becoming very selective in their choice. So far, not much different from Toronto, except that Starbucks hardly stands a chance in NZ. I wonder if Starbucks consumers qualify as coffee connoisseurs in Toronto? (I hope not).


A cortado from Altezano in Auckland

New Zealand coffee connoisseurs will go a long way to get their daily caffeine fix, and favoured cafés can be anything from a‘hole-in-the-wall’ or mobile outlet just big enough to accommodate a good coffee machine and its skilled operator to stylish venues with lounge-style seating serving gourmet treats and meals. Here’s where they’ve really got it right. I mean good coffee is very accessible in NZ, particularly when you factor in the dozens of coffee mobiles trolling around town ready to dispense their liquid gold. I simply love them!

One of NZ's many coffee mobiles, fitted with the finest Italian espresso hardware

You didn’t know, did you?

New Zealand baristas have consistently shown their passion and expertise scoring in the top ten at world competitions since 2002.

New Zealand has more roasters per capita than anywhere in the world, and The Coffee Lovers lay claim to the fact that Kiwi coffees are also the best in the world.

The flat white debate
New Zealand has also gained notoriety on the world's coffee scene having been credited with pioneering the "flat white" - traditionally a less milky brew with textured rather than frothy milk.
The flat white is enjoying new popularity in Britain and the United States, attributed not just to the demand from the number of Aussies and Kiwis travelling overseas, but also the many Australasians who work as baristas in cities like London and New York.
But wait, the Kiwis have landed here too! I’ve been alerted by my friend T that there are some new players in town like Te Aro. I trust her judgement when she tells me they are extraordinary and yes, Torontonians can finally experience the joys of the flat white now (http://www.te-aro.ca/pages/about-us).


Midway through my delightful flat white at Te Aro, Toronto


New Zealand coffee terminology:

  • espresso / short black - basis for all coffee styles, espresso is full-flavoured, fragrant, with a velvety body and lingering after-taste; single serving in a demi-tasse (small cup)
  • macchiato - a single or double espresso shot, just stained with frothed milk
·         long black - single serving of espresso, with the same amount of hot water added; served in large cup filled to just under the top, or sometimes with the water provided separately
·         flat white - one third espresso, two thirds steamed milk with a touch of swirled froth
·         cappuccino - regular espresso with equal parts steamed milk and foam, sprinkled with chocolate or cinnamon
·         caffe latte - regular espresso, topped with hot milk and little or no froth
·         mochaccino - one third each of espresso, steamed milk, cocoa
·         ristretto - (‘restricted’) is 15-20ml of espresso, the essence of coffee
·         piccolo latte - miniature latte made with ristretto and 70ml of steamed milk; delicate flavoursome drink
·         espresso Romano - espresso served with a twist of lemon
·         latte macchiato - steamed milk with espresso on the side
·         espresso con panna - espresso topped with a dash of whipped cream
·         cortado - Spanish version of the piccolo served in a 60ml demitasse cup
·         fluffy - for kids, a demi-tasse filled with foamed milk, sprinkled with chocolate and served with marshmallow on the side and a small chocolate fish.


It’s a good thing I am in Toronto this month I really miss the flat white.

And if you don’t know, now you know.


Source:

www.newzealand.com/travel/media/features/food-&-wine/food&wine_new-zealands-coffee-scene_feature.cfm


Saturday, 9 June 2012

Très French, Très Lazy Brunch


Galette Complète / Ham and Cheese Crepe

It’s Sunday morning and boy oh boy how I love a nice languorous weekend brunch, and if I am not going out to get it, staying in is just as good. Next to dinner, I love spoiling myself and the people I care for with a rich and lazy brunch.  I dearly miss having my friends over for weekend brunches like I did back inToronto. They would bring the Prosciutto di Parma and a bottle of Prosecco and I would dish up a variety of brunch favorites. I often like to make jam-filled crepes but today I am in the mood for something savory and much more filling. This morning it’s galettes!

Galette is a type of thin large pancake from Normandy and Brittany, where it was known to sometimes replace bread as basic food. One of the most popular varieties of galette is covered with Emmental cheese, ham and an egg, cooked on the galette. In France, this is known as galette complète.

Like so many foods here in New Zelanad, the ham can be exceptional. It’s not uncommon to go to the supermarket and find freshly cooked champagne ham on the bone, and still hot. Alternatively, you may use good quality Black Forest Ham, or even pancetta or speck. Pusateri’s in Toronto has some wonderful options. As for the cheese, use something that melts well like, Emmental, Edam or Gruyere cheese.

Do not worry too much about exact measurements. You can keep adjusting the flour, milk or water until you get a fairly runny batter, the consistency of thin cream.

Portion: 2

Crepe Batter:
1 egg
All-purpose flour - about 1/2 cup
Milk - about 1/3 cup
Sparkling  mineral water - 1/4 cup (this gives the crepe a fluffiness and lightness, and it makes all the difference)
Note: Speaking from experience, don't use soda water, it will ruin the batter.

Filling:
2 eggs (1 per galette)
Cheese – grated (about 1 cup)
Ham – thinly sliced (1/2 cup)
Salt & pepper

Making the Galette:

In a bowl, break an egg and whisk it.

Gradually add the flour and continue whisking.

Add the milk and some sparkling mineral water.

Again, if the batter is really thin add more flour.You can keep adding and adjusting these ingredients as you are whisking.

Make sure all the lumps are whisked away and the batter is smooth with a fairly thin consistency. Place the batter in the refrigerator for about 10 or 15 minutes to rest. This will also thicken it up a bit (if it is too thick once out of the refrigerator add a bit more of the water).

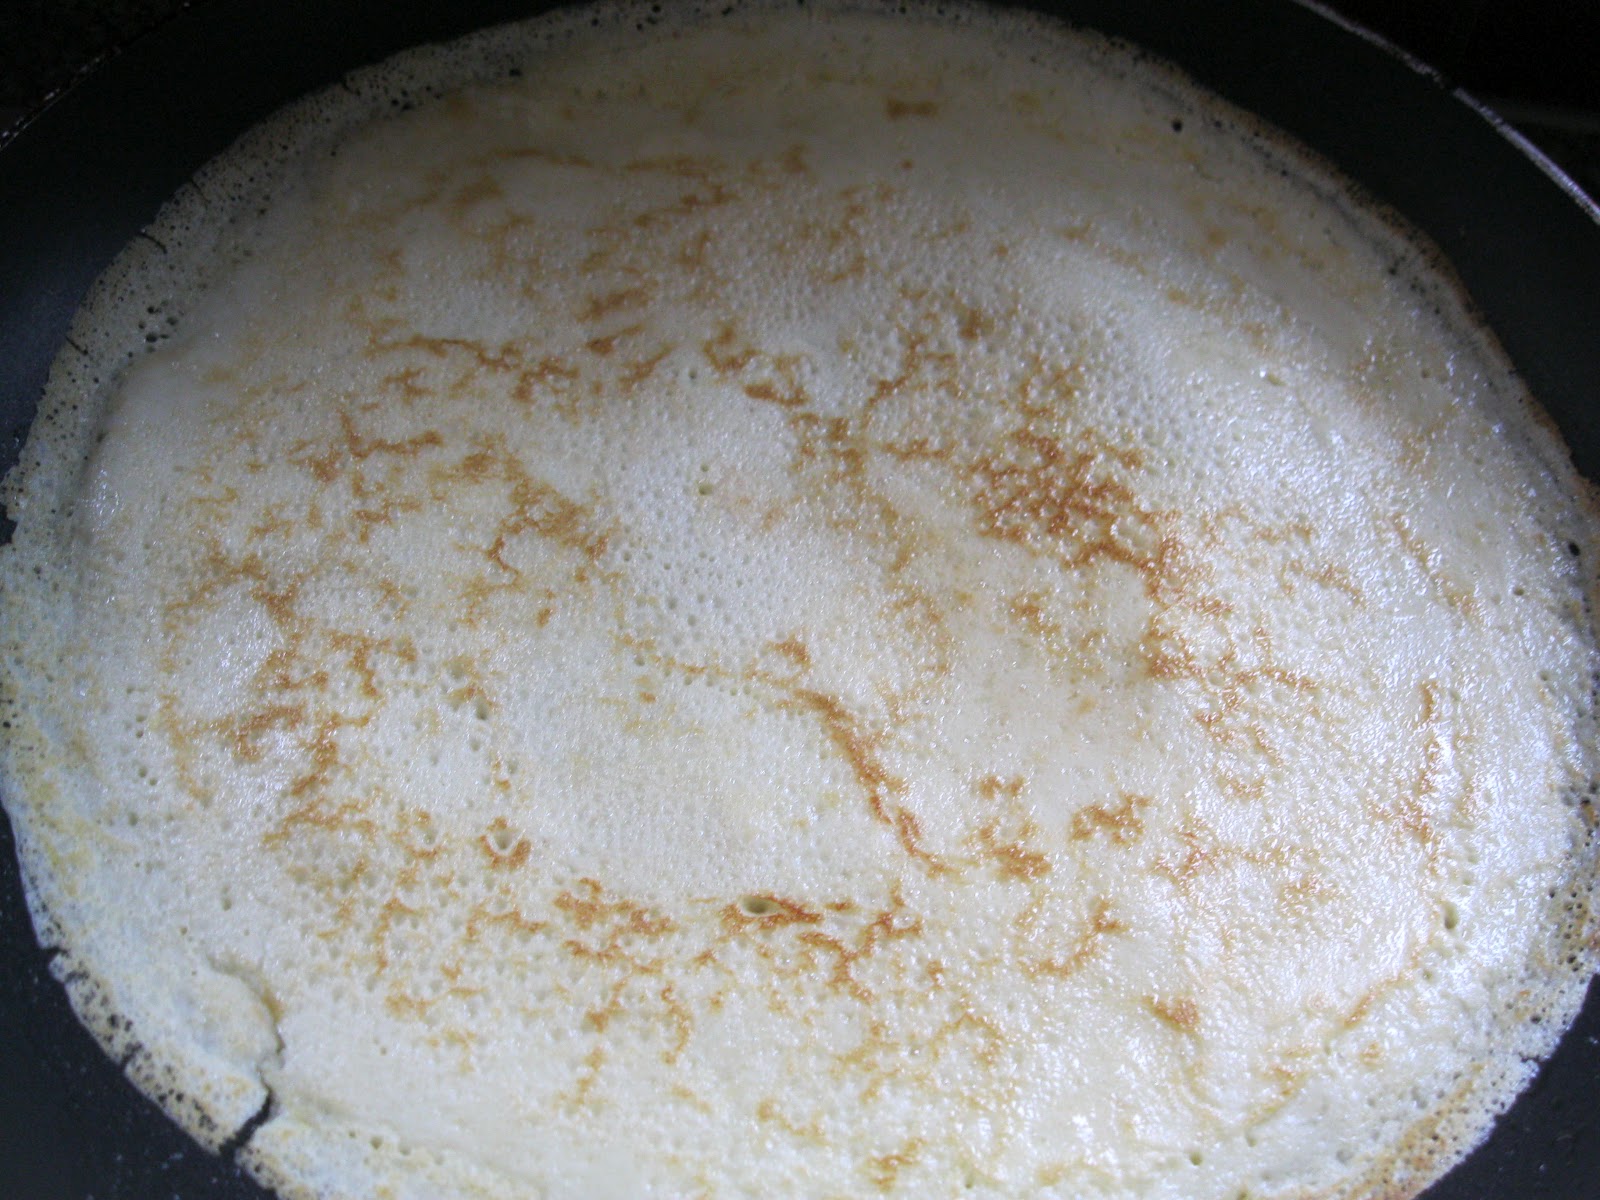
Using a large non-stick skillet, turn the stove to a medium high heat and melt about 1 tsp. butter. Use a paper towel to help spread it evenly all over the pan and the edges.

Take a ladle-full of batter and place in in the hot pan rolling  the pan around to ensure the batter covers the entire pan evenly.

Let the crepe cook for about 45 seconds and flip over.


As the underside is cooking, break in 1 egg on top of the crepe and smudge it around with a whisk or fork, add the grated cheese and the thinly sliced ham, then season with salt and pepper (do not cook the egg through, the middle of the galette should be oozing).


Now, with a spatula, fold the crepe over. Press down gently on the crepe with a spatula to flatten it down a bit (I diverge from convention here, normally all four sides are folded over but I find this  too messy and needlesly complicated).


Flip it over to the other side for a few more seconds and then remove onto a plate.
Season the galette with more salt and pepper e voila!


Saturday, 2 June 2012

Eat My Gooey Romanian Donuts!


Yogurt Doughnuts / Gogoşi cu Iaurt


I think every great food culture has some version of the doughnut. In other words, people the world over have found some creative way of deep frying dough and elevating it to something more or less emblematic of their respective cultures. One can find some rendering of this humble yet indulgent delight wafting through the streets of cities around the world; in Spain and parts of Latin America you`ll find churros, in Italy you`ll find zeppole, in France beignets, in Germany Berliners, and in Romania you will most definitely find gogosi.

My grandmother used to make dozens of these for me growing up. I would sit next to her in her tiny kitchen on the outskirts of Brasov and would watch as she transformed a bowlful of pale batter into golden brown nuggets of joy. I`d eye each freshly made “gogoasa” making sure it vanished before the next one hit the plate. I never attempted to make them myself though, until I moved to New Zealand. In fact, I had almost forgotten all about them until one day back in September, just after having arrived here, I dropped by a farmer’s market in Kerikeri that seemed to have a surprising amount of European vendors and visitors. They were cooking up various delicacies from beautiful sausages to delectable pastries and of course, various deep fried dough delights.
 Me enjoying Oliebollen at Kerikeri Market

There and then I saw something that looked familiar and smelled of my grandmother’s kitchen. I believe they were Dutch Oliebollen freshly made in front of me. I purchased a few and proceeded to devour them with gusto. I may very well have been 5 years old again in Baba’s kitchen. By the time I made my way to the last one I looked like I fell face first into the icing sugar. That experience prompted me to make my own at home.

My favorite ones are yogurt-filled (or gogosi cu iaurt). These are brown and lightly crispy on the outside and rich and gooey on the inside. I make them often now, seeing as my partner regularly blackmails me into making them for him with an indignant “if you love me you will make me gugosi!”, more often than my waistline can handle.

A Note: New Zealand has extraordinary dairy products and I found that using one of the local thick and creamy Greek yogurts renders the best results. So here goes for the perfect yogurt filled donuts arrived at after much tinkering to create the perfect batter.


In a bowl, mix the following ingredients using a wooden spoon until nice and smooth:
  • 200g yogurt (unsweetened thick and creamy Greek yogurt, or Balkan yogurt)
  • 150g self-raising flour
  • 1 egg
  • 4 tbsp. white sugar (you may use 3 if you’d prefer)
  • 2 tbsp. vanilla sugar (alternatively, you may use 6 tbsp. sugar and add vanilla extract)
  • 1 tsp. baking powder
  • A pinch of salt
  • Grated lemon rind (optional)
Fill a small to medium pot or a pan with about 1.5 inches of neutral oil (i.e. sunflower oil, rice bran oil, grape seed oil) and set stove at just over medium heat.

Use a tablespoon to scoop up the batter and drop it into the oil. Do about 4 at a time if using a small pan.

Let them fry for less than a minute or until you see them turn a dark golden brown colour then flip them over so the other side may fry.

Take the dumplings out of the frying pan and set onto a paper towel. Dust with icing sugar.


To test if they are cooked just right, bite into one and if the middle is slightly runny you are in for a treat. If the middle is dry or more like a donut, it’s still nice but make sure to cook the next batch for a shorter time.


Tuesday, 8 May 2012

Improvised Belly Trance


Pork Belly with Braised Savoy Cabbage and Cauliflower Purée


I think I may have unwittingly converted a couple of friends to the ethereal delights of pork the other night while deliberately endeavouring to convert myself to the cruciferous displeasures of cauliflower by enlisting the help of my trusty sidekick, the never disappointing pork belly. The stars must have been aligned that night, or could it have been the mystical influence of the Supermoon? The evening culminated into an unplanned and improvised process that ultimately left everyone glazy-eyed and content.

It was a Saturday afternoon, and we were driving back from the country, having spent the day going to a couple of farmers markets, dropping by a local vineyard for some wine tasting, and ending the trip with a visit to a cheese shop. I was in good spirits, my sensory requirements have been well looked after and I was now eager to share the joy. I was in the mood for something cozy and comforting like a stew with white beans but my partner can’t stand beans. I resented it because I missed eating beans since arriving in New Zealand. They remind me of meals from my childhood ( i.e. white bean soup with tarragon) and of my travels through the Caribbean and Central America where beans are a staple ingredient to so many dishes. But then I reminded myself that I too wouldn't go near some foods. There are less than a handful of vegetables to which I refuse bestowing the attribute of "comestible food", namely broccoli, okra, and cauliflower. I can’t stand the things!  I pride myself on eating everything as long as it is tasty and made well, however I have yet to be converted to these three vegetables. My partner, on the other hand loves them and he too has missed eating them since my move here. So there and then I decided to take the matter into my own hands and coax one of these vegetables into submission. Cauliflower it is!

As I was rolling the idea around in my head a menu began to come together. I was going to make pork belly, with braised savoy cabbage, and cauliflower purée. Being Romanian, the one thing that I am sure of is that cabbage and pork are a marriage made in heaven. I had a nice piece of free-range pork belly from Freedom Farms that had the potential to transform even cauliflower into something edible. I had to get my head around it all, guests were coming in a couple of hours and I had no idea if this was going to work. Once I started on the pork belly however, I fell into a trance, I was in the Zone.

Forward a couple of hours into the evening and we are all sitting around the table enjoying some excellent wine and eating our meal. Suddenly, my friend confessed that she doesn't normally eat pork. I felt terrible, it's one thing to inflict cauliflower on myself but I didn't count on my guests not fancying pork. I was relieved to know how much they enjoyed it. The sweetness of the braised savoy cabbage and cauliflower purée lay in perfect harmony with the savoury pork belly. The thyme ever so subtly lent a fragrance to the underside of the pork belly while the crispy cracking provided the perfect contrast to the tenderness of the cabbage and the silkiness of the purée . My guests were happy, I was happy, and I can now cross off cauliflower from my list of forbidden foods.

So here is how to make this flavourful dish by special request from Alex and Jamie:


            The Pork Belly:
Good size chunk of pork belly
            1 medium onion - halved
            2 large heads of garlic - halved
            1 carrot – coarsely chopped
            1 baby fennel (use only stalks here, set the bulb aside for garnish)
            Olive oil
            Salt and pepper
            White wine and/or vegetable stock

  • Score the skin.
  • Massage the belly with olive oil, and plenty of salt and pepper
  • In a roasting pan, lay the pork belly, skin side up, on top of a bed of whole garlic cloves and onion that have been sliced in half, chopped carrot and fennel stocks. Top off the bed with a substantial cover of thyme sprigs.
  • Pour in about 2 cups of white wine into the pan.
  • Cover with tin foil.
  • Place in preheated oven and bake at about 160 C/ 320 F for about 2 hours. Check now and then to ensure the liquid has not completely disappeared in which case, add more wine or vegetable stock.
  • Towards the last 15 minutes, remove the pork belly from its bed of herbs and vegetables and let grill (set oven to ensure the heat is coming from above) by itself uncovered so that you get a nice crispy crackling.
  • Remove the carrots, onion and some of the caramelized garlic from the pan and set aside.
  • Create a sauce from the remaining jus and bits of roasted garlic by deglazing the pan with more wine, add some butter and adjust seasoning to taste.

While the pork belly is cooking…

           The Cauliflower Purée :
½ a head of cauliflower – chopped into florets
1.5 – 2 cups of milk
1 garlic clove
            ¼ tsp. cumin
1 small potato (optional)
1tbsp butter
  • In a medium sauce pan, pour in the milk then add in 2/3 of the cauliflower florets and a whole clove of garlic. I added one small potato for more consistency but this is up to you.
  • Let simmer on low heat until softened, about 25 minutes.
  • Meanwhile, take the remaining 1/3 of the florets, sprinkle with olive oil, cumin, salt & pepper and roast them in the oven for about 20 minutes or until they begin to soften and caramelize. I toasted some cumin seeds which I then ground and sprinkled on top of the florets before popping them into the oven. Cooking the cauliflower two ways will give the purée a richer and more complex flavour. Once both are cooked, tip in the contents, including the remaining milk that the florets were cooking in, into the food processor and blitz until silky and smooth adding butter, and salt & pepper to taste.
  • You can also add some of the caramelized garlic paste from the pork belly into the puree for extra richness of flavour.
  • You can set it aside and reheat it later before serving.
             The Braised Savoy Cabbage:
             1/3 of a head of savoy cabbage – chopped into thin slices
             2 shallots - sliced (or ¼ sliced leek)
             1 garlic clove - crushed
             1 tbsp. chopped bacon or pancetta
             Olive oil
             1/4 cup apple cider vinegar
             1 cup vegetable or chicken stock

  • In a large pan, sauté a couple of shallots, a crushed garlic clove and a small amount of diced bacon or pancetta.
  • Add the thinly sliced savoy cabbage, sprinkle with salt and pepper and stir letting the ingredients sweat and soften.
  • Add the apple cider vinegar and ½ cup of vegetable stock into the pan, cover and let cook at low heat for about 35 or 40 minutes. Keep adding liquid along the way if the cabbage looks too dry.
  • You are now ready to make use of the caramelized carrots, onion, and garlic that you have removed from under the pork belly. Squeeze out the garlic paste and chop up the carrots and onion then stir them into the braising cabbage. This will add some sweetness to it and loads of flavour! Let it continue cooking for another 5 minutes or so.
         
          Garnish the dish the reduced jus and thinly sliced baby fennel and voilà!

Thursday, 3 May 2012

Give Me Some Tail!


Imagine wondering around a four thousand year old city on a hot Andalusian summer afternoon, the tree-lined streets are quiet, whitewashed, serene.  I am searching for the quintessential Spanish eating experience. I want timelessness, I want old school Spain minus the kitsch, and above all, I want the Andalusian oxtail stew (the Spanish refer to it as Rabo de Toro or Cola de Toro). It was my first time in the city of Jerez de la Frontera , a city I have been to numerous times since and will return to many times over for its entrancing beauty and its delectable food.


I slipped onto a narrow street (this seems to be a running theme) and there it was, Restaurante Gaitan. Taking a good look inside, it was clear that this place had not changed in eons. It had the feel of a bygone era; a timeworn dining room crammed with old paintings, the rooms framed by arched doorways lined by the distinctive colour of Jerez, warm mustard yellow. The clientele looked like the loyal die-hard type. They were settling in for their pre-siesta afternoon meal and I was settling in for my first ever Cola de Toro a la Jerezana. For a second I wondered if I was about to partake in the wanton devouring of the loser of last night’s bull fight. Thankfully these days they use ox tail. It was a lovely meal of simple, succulent braised ox tail, the meat barely clinging to the bone, served on top of sliced potatoes. 


Once I returned home to Toronto, I decided to recreate it simply from memory. I didn’t bother to look for a recipe, I trusted my palate’s memory to guide me. I am certain that in Jerez they would have used a dry sherry ("sherry" is an anglicization of Jerez) to braise the meat but a good bottle of fino is not easily attained in New Zealand and it costs a fortune. If living in Toronto, Tio Pepe’s Palomino Fino is perfect and costs only 16 CAD. Instead I use a nice red wine, which is fine considering that outside of Jerez this dish is made with a good local red. As for good free range oxatils, I love Cumbrae's in Toronto (http://www.cumbraes.com/) and Farro (http://www.farrofresh.co.nz/) or Nosh in Auckland.  Here goes this delicious and very forgiving one pot dish:


4 large meaty ox tails
Flour
Olive oil
2/3 large capsicums or 2 red bell peppers - sliced in thin strips about 3cm long
One whole onion - diced
1 carrot sliced (optional)
Bottle red wine
Beef stock (optional)
1.5 tsp pimenton dulce or sweet paprika
Fresh thyme - about 2 sprigs
Salt and pepper


Lightly dust ox tails with flour then brown them in olive oil. Set aside.

In same pot, sauté the onions, carrots, and capsicums for 3-4 minutes.

Add the tails back in and let the veggies and meat sweat together for a minute.

Pour in a bottle of good red wine so it just about covers the tails. Alternatively, you may use half a bottle of wine and an equal amount of beef stock depending on your preference. Play around with the ratio of wine to stock.

Sprinkle in the pimenton, thyme, salt and pepper to taste.

Cover the pot with a lid and pop into the oven at about 325 F or 165 C for about 2 hours. Check in now and then to turn the meat over and to adjust the seasoning.

Serve over round slices of potatoes either roasted or boiled.

Buen provecho!